

Log in and set up your profile and users. It’s business time!
Overlay

Step 2

Step 2 overview
Now you’ve got everything you need to log in and set up Bankline.
Here’s where your great work from Step 1 pays off. Your planning meeting will have given you the info you need to set up Bankline in the way that works for your business.
We’ll take you through each stage of profile set-up and we’ll share links to useful help resources as we go.
Cora can also guide you through the whole set-up process from start to finish in Bankline. Once you’re logged in, click the chat button and type ‘I’m new here’ to begin.
Tip: You don’t have to explore all the resources in each section, we’re just giving you options to choose from.




1. Logging in for the first time
To activate your smartcard and log in for the first time, follow the instructions in our support guide:
You can also refer to the resources below. If you need any help, click the chat button on the log in page. Cora will answer your questions and help you get logged in.
Tips for logging in
Always start from www.natwest.com/bankline, when logging in and go to the login page from there.
Don’t confuse your smartcard PIN with the Log in PIN you’ll create at first log in. The smartcard PIN is just for using with your smartcard.
Once you put in Customer ID and User ID, you can find log in steps on the drop-down on the next screen in the logging in journey.
Other resources to help you log in
Setting up your profile
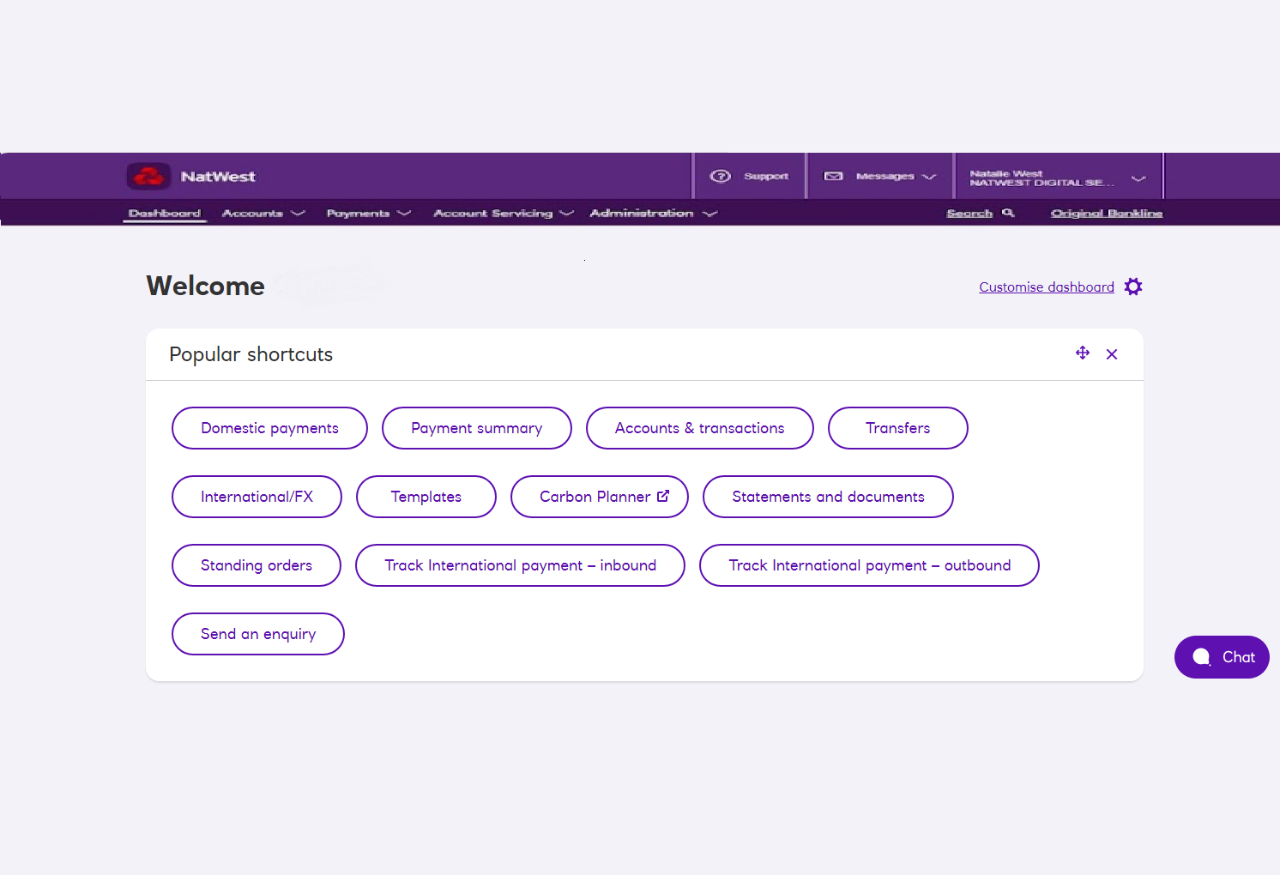
Once you’re logged in, you’ll land on the dashboard.
This is the heart of your Bankline profile. Check out the menu that runs across the top of the screen. This is where you’ll access all features in Bankline, and we’ll flag which section to head to for each part of this profile set-up journey.

Let Cora help you settled in
Now’s the perfect time to meet Cora. Click the chat button at the bottom right of your Bankline page, click ‘Continue’, and then type ‘I’m new here’.
Cora will then guide you through the set up process, asking you questions to direct you to the right place along the way.
2. Adding accounts
Select 'Accounts' in the menu at the top of screen. Here you’ll see all the options that relate to accounts. As an administrative user, most of the sections you’ll need will be under ‘Account management’.
When your profile is created your main account will be automatically added. To add more accounts follow the steps here:

Account tips
Refer to the workbook from your planning session, to add the accounts your team has agreed.
If the accounts are connected to your main account they’ll be listed when you go to add them. Don’t worry if you can't see the account you’re looking for, as these can still be registered as ‘account not listed’ or third party accounts.
You can restrict which users can access accounts, we’ll cover this in later sections. Don’t worry if you add accounts in that you don’t want all users to see, this is decided by the roles you assign. We’ll cover this later.
Resources to help with accounts

3. Choosing and creating roles
In Step 1 did you take a look at the pre-defined roles we have available for you to assign to users?
If you’ve decided that these pre-defined roles will work best, then you can skip this section, because we’ll show you how to assign roles later on when you’re creating users.
If you’ve decided that non of the pre-defined roles are suitable you’ll need to create role(s), you can learn how to create them here.
Full list of roles
If you need a little extra help with roles, read the full list of roles we have available.
Information Message
Creating a new role
Did you find a pre-defined role that was almost there, but not quite right. Don’t worry you can tailor a role to suit you:
Information Message
4. Payment limits and controls
This is where you’ll input the limits and controls you discussed as a team in Step 1. You can set them, see how they work in practice, and change them anytime you need to.
Go to the Administration section in the top menu and you’ll find the options to set limits and controls, including:
- Dual administration
- Dual approval
- Dual control of templates and bulk lists
- Profile-wide payment limits
- International payment controls
We’ll cover individual user limits when you’re setting up your users.
Watch this video to see how to set your chosen limits and controls:
Resources for adding limits and controls

Tips for creating users
You’ll need to create a unique User ID for each user. It can’t be changed once created, and it’s up to you to share it with the user, together with your Bankline customer ID, once they’re set up.
A user's individual approval limit is the limit they can approve a payment up to.
Once created and approved, we’ll email the user an activation code, and it will take up to seven days for their smartcard and reader to arrive for UK addresses. More on this in Step 3.
Resources for creating users

Congrats, you've set up your profile!
Time to pause and admire your handy work.
You’ve already got to grips with Bankline and built strong foundations. In Step 3 we’ll help you get your team onboard and set them up for success.
Smartcards for the users you’ve just created will be on their way soon.
If you’re ready to sneak a look at how to support your team or how to make payments, move on to Step 3.
If not, take a well-deserved break. Rest easy, knowing you’ve already done the hard work, and you can join us in Step 3 whenever you’re ready.
Opens in a new window